 Glenhaven Siding
 New-Construction Windows in Silver Beach: Built for the Water, the Rain, and the Moss
Silver Beach homes go up or get built out in one of the harder climates in Washington to get windows right in. It isn't any single factor — it's the combination. Coastal air moving in off the water carries salt that finds its way into hardware and fastener heads. Wind-driven rain doesn't just fall straight down here, it gets pushed sideways into wall assemblies during winter storms. And a long, wet moss season means anything that traps moisture against wood or vinyl for months at a time will eventually show it. New-construction windows are your one real chance to build all of that in correctly, before siding and trim cover up the details that matter most.
This page is about that one job: installing new-construction windows for a home being built or substantially reframed in Silver Beach and the surrounding Glenhaven area of Whatcom County. Replacement windows are a different job with different rules — we cover those separately. Here we're talking about openings framed for windows with a nailing fin, going in before or alongside the water-resistive barrier and siding.
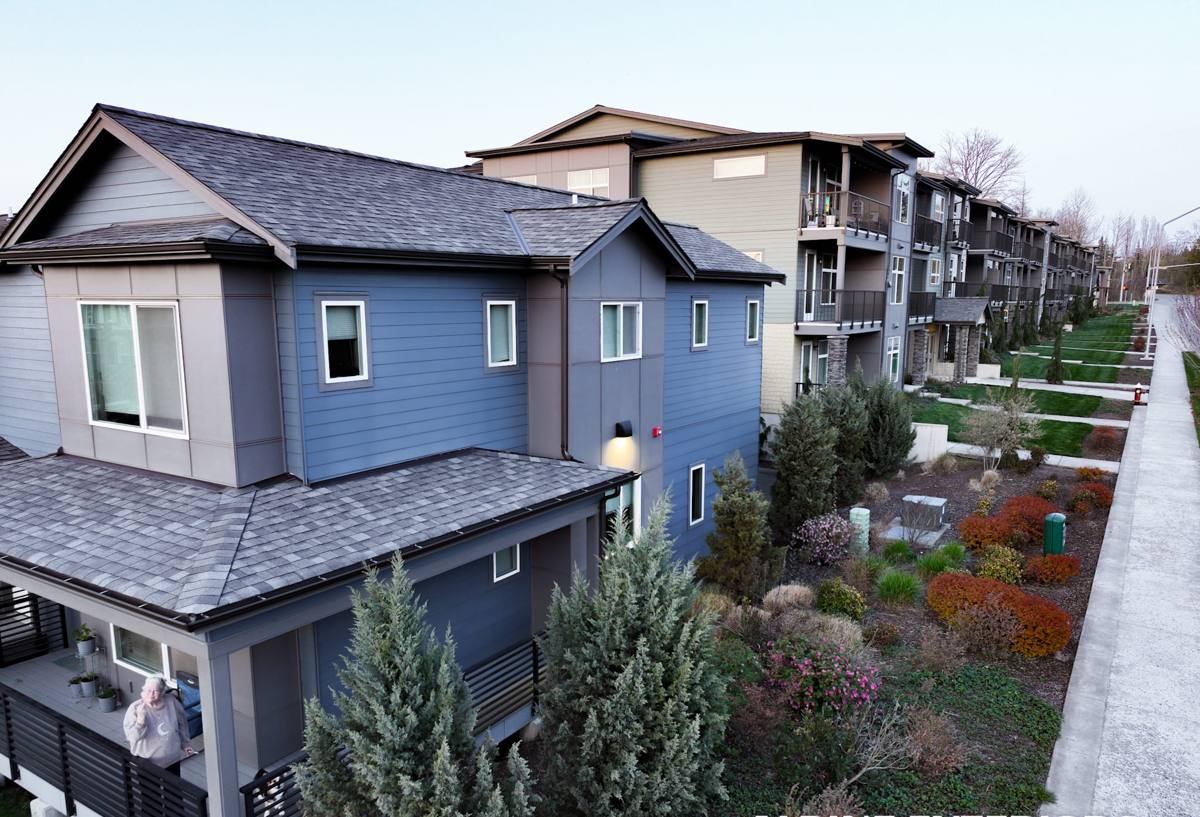
What This Climate Actually Does to a Window Opening
Salt air
Homes within a few miles of the water in Whatcom County take in salt-laden air more often than most people expect, even on days that feel dry. Salt is corrosive to exposed fasteners, hinges, and low-grade cladding over time. It won't ruin a window in a season, but it will find every unprotected metal surface over the years a house stands. That's why fastener choice and flashing metal compatibility matter more here than in an inland build.
Driving rain
Whatcom County storms regularly come with real wind behind the rain, not just vertical drizzle. Wind-driven rain gets forced up and under trim, into reveals, and against any gap in the flashing sequence that wouldn't get tested in a calmer climate. A window opening that would pass fine in a low-wind region can leak here if the sill pan, flashing laps, and sealant joints aren't done in the right order.
A long moss season
Tree cover, humidity, and mild temperatures give moss and algae a long growing window in this part of Washington — often stretching from fall through spring. Moss holds moisture against whatever it's growing on. On a window, that usually means sills, bottom corners, and any horizontal trim ledge. Left alone, that trapped moisture is what eventually causes wood rot, finish failure, or, on lower-grade vinyl, discoloration and premature brittleness.
New-Construction vs. Replacement: Why the Distinction Matters Here
A new-construction window has a nailing fin (or flange) around the perimeter of the frame. It's designed to be installed into a rough opening before the exterior wall is fully closed in, so the fin can be integrated directly into the water-resistive barrier and flashing system — then covered by siding and trim. A replacement window, by contrast, is built to fit inside an existing frame with the old siding staying in place around it.
That distinction isn't just paperwork. It changes the entire sequence of who does what and in what order:
- The rough opening has to be framed, squared, and sized correctly before the window ever shows up on site.
- The water-resistive barrier (house wrap or building paper) has to be sequenced with the window flashing in the right shingle-lap order — not just stapled on after the fact.
- The window installer and the siding crew need to be coordinated, since the flashing details connect directly to how the siding terminates at each opening.
- Inspections typically happen at specific framing and weatherization stages, which means timing matters more than on a simple swap-out.
On new construction, we're not just hanging a window — we're building the water management system for that opening from the ground up. Get that wrong on a Silver Beach build and you won't see the consequence in month one. You'll see it two or three winters in, as a stain on interior drywall below a window that "should" have been fine.
What a Correct New-Construction Window Install Involves
There's a specific order that keeps water moving out and down, never in and trapped. Skipping or reversing any of these steps is how call-backs happen.
- Rough opening check. Confirm level, plumb, square, and correct sizing with manufacturer tolerances before the window ever gets set.
- Sill pan flashing. A sloped, sealed sill pan under the window directs any water that does get past the exterior back outside instead of into the wall cavity — this is the detail that matters most in a driving-rain climate.
- Water-resistive barrier integration. Building paper or house wrap gets lapped so water sheds over the top of each flashing layer, never under it.
- Setting and fastening the window. Shimmed plumb and level, fastened per manufacturer spec — over-driving or under-driving fasteners is a common cause of frame distortion and early seal failure.
- Head, jamb, and sill flashing tie-in. Each side gets flashed in the correct sequence so the head flashing overlaps everything below it.
- Insulation of the gap. Low-expansion foam or backer rod and sealant fill the space between frame and rough opening — packed too tight, it can bow the frame; left too loose, it's a thermal and air leak.
- Interior and exterior sealant. Compatible sealants at the right joints, not caulk used as a substitute for proper flashing.
- Siding and trim tie-in. The final visible layer, but only correct if everything under it was done in order.
A quick homeowner checklist if you're watching this happen on your own build in Silver Beach:
- Ask to see the sill pan flashing before the window goes in — it should be visible for a few minutes during the process.
- Confirm the water-resistive barrier laps over the flashing at the top of the window, not under it.
- Check that shims are used, not just fasteners pulling the frame tight to an out-of-square opening.
- Make sure exterior sealant is applied at the manufacturer-specified joints only, not as a blanket fix for gaps.
- Confirm which inspections are required at your stage of construction and that they're scheduled, not skipped.
Frame Material Options for This Climate
Every frame material handles salt air, wind-driven rain, and a long moss season a little differently. None of them are wrong choices across the board — it's about matching the material to the exposure and your maintenance expectations.
| Frame Material | Moisture & Salt Air Behavior | Maintenance | Trade-Offs |
|---|---|---|---|
| Vinyl | Won't rot or corrode; seams and welds are the weak point if not factory-sealed well | Low — occasional cleaning of tracks and weep holes | Lower up-front cost; can look and perform inconsistently between manufacturers, so we're selective about which lines we install |
| Fiberglass | Very stable in wet, salt-exposed climates; expands and contracts close to glass, reducing seal stress | Low to moderate | Higher upfront cost than vinyl; fewer color/style options in some lines |
| Wood-clad | Cladding protects the exterior face, but any breach at a joint or fastener lets moisture into wood underneath — a real risk under moss and prolonged wet exposure | Higher — exterior finish and joints need periodic inspection | Best interior appearance and warmth; requires more disciplined upkeep in this climate |
| Aluminum | Corrosion-resistant coatings needed near salt air; conducts heat and cold more than other frames | Low | Slim sightlines; less common on residential builds here due to thermal performance |
For most Silver Beach new-construction projects, we lean toward vinyl or fiberglass for the bulk of openings, reserving wood-clad for homeowners who want that look on specific elevations and are prepared for the maintenance that comes with it. We'll walk through the actual trade-offs for your specific plans rather than push one line across the board.
What Drives Cost on a New-Construction Window Job
Costs on new-construction window installation swing more on labor and detailing than on the glass itself. Broadly, homeowners in this area should expect a wide range depending on the factors below — we'll give you real numbers once we've seen your plans, not a blanket figure that doesn't apply to your build.
| Factor | Why It Moves the Price |
|---|---|
| Number and size of openings | More openings and larger units mean more flashing detail work and material, not just more glass |
| Frame material | Vinyl, fiberglass, wood-clad, and aluminum carry different material costs and installation labor |
| Wall assembly complexity | Homes with rainscreen gaps, thicker wall sections, or non-standard framing take longer to flash correctly |
| Glazing and energy code requirements | Washington's energy code sets minimum performance targets that can affect which glass packages are viable |
| Coordination with siding and trim crews | Tight scheduling between framing, window install, and siding close-in affects labor efficiency |
| Site access and stage of construction | Multi-story openings or a site further along in framing can add scaffolding or lift time |
Our Process for a Silver Beach New-Construction Project
We work new-construction window jobs the same disciplined way every time, adjusted for your specific plans:
- Plan review. We look at window schedules, rough opening sizes, and elevations before anything is ordered.
- Timeline coordination. We coordinate directly with your general contractor or framing crew so windows arrive and get set at the right point in the build sequence — not too early, not after siding prep has already started.
- Material selection. We go through frame material and glazing options against your budget, style, and the specific exposure of each elevation — a north-facing wall exposed to prevailing wind gets treated differently than a sheltered side.
- Installation. Sill pan, flashing, setting, and sealant, done in the order described above, by the same crew from first opening to last so details stay consistent.
- Inspection-ready documentation. We flag what's ready for your local building department's framing and weatherization inspections.
- Final walkthrough. We check operation, seals, and finish on every opening before we call the job done.
Why a Crew That Already Works Silver Beach Matters
Window installation isn't exotic work, but the details that keep a window watertight for decades are specific to the exposure it faces. A crew that installs mostly in dry inland climates doesn't build the same habits around sill pan flashing and wind-driven rain that a Whatcom County crew develops from doing it week after week in this weather. We know which elevations in this area tend to take the worst of winter storms, how far salt air realistically travels inland from the water, and how long moss actually takes to establish on an unmaintained sill in this climate — because we see it on callbacks from other people's work as often as we see it prevented on our own.
We're also familiar with how local building departments in Whatcom County schedule and expect framing and weatherization inspections, which keeps your build moving instead of waiting on a misunderstanding about what needs to be visible at each stage.
Keeping New-Construction Windows Performing After the Build
A correct install gives you a long runway, but a few habits extend it further in this climate:
- Rinse accumulated salt residue off frames and hardware periodically, especially after winter storm cycles.
- Keep weep holes clear so any water that does reach the frame's drainage path can actually drain.
- Remove moss or algae from sills and horizontal trim before it establishes — a soft brush and mild cleaner is usually enough if caught early.
- Have exterior sealant joints checked every few years; sealant is a maintenance item, not a permanent fix.
None of this is difficult, but skipping it is exactly how a well-installed window ends up looking neglected a decade in.
If you're planning a new build or an addition in Silver Beach and want windows installed the right way the first time, we're happy to walk your plans and give you a straightforward, no-pressure estimate — use the form below to get started.